Step 4: Your system
This is the interesting step. Everything so far was you describing your house. Now the calculator makes a suggestion, and you get to change it and watch the numbers move.
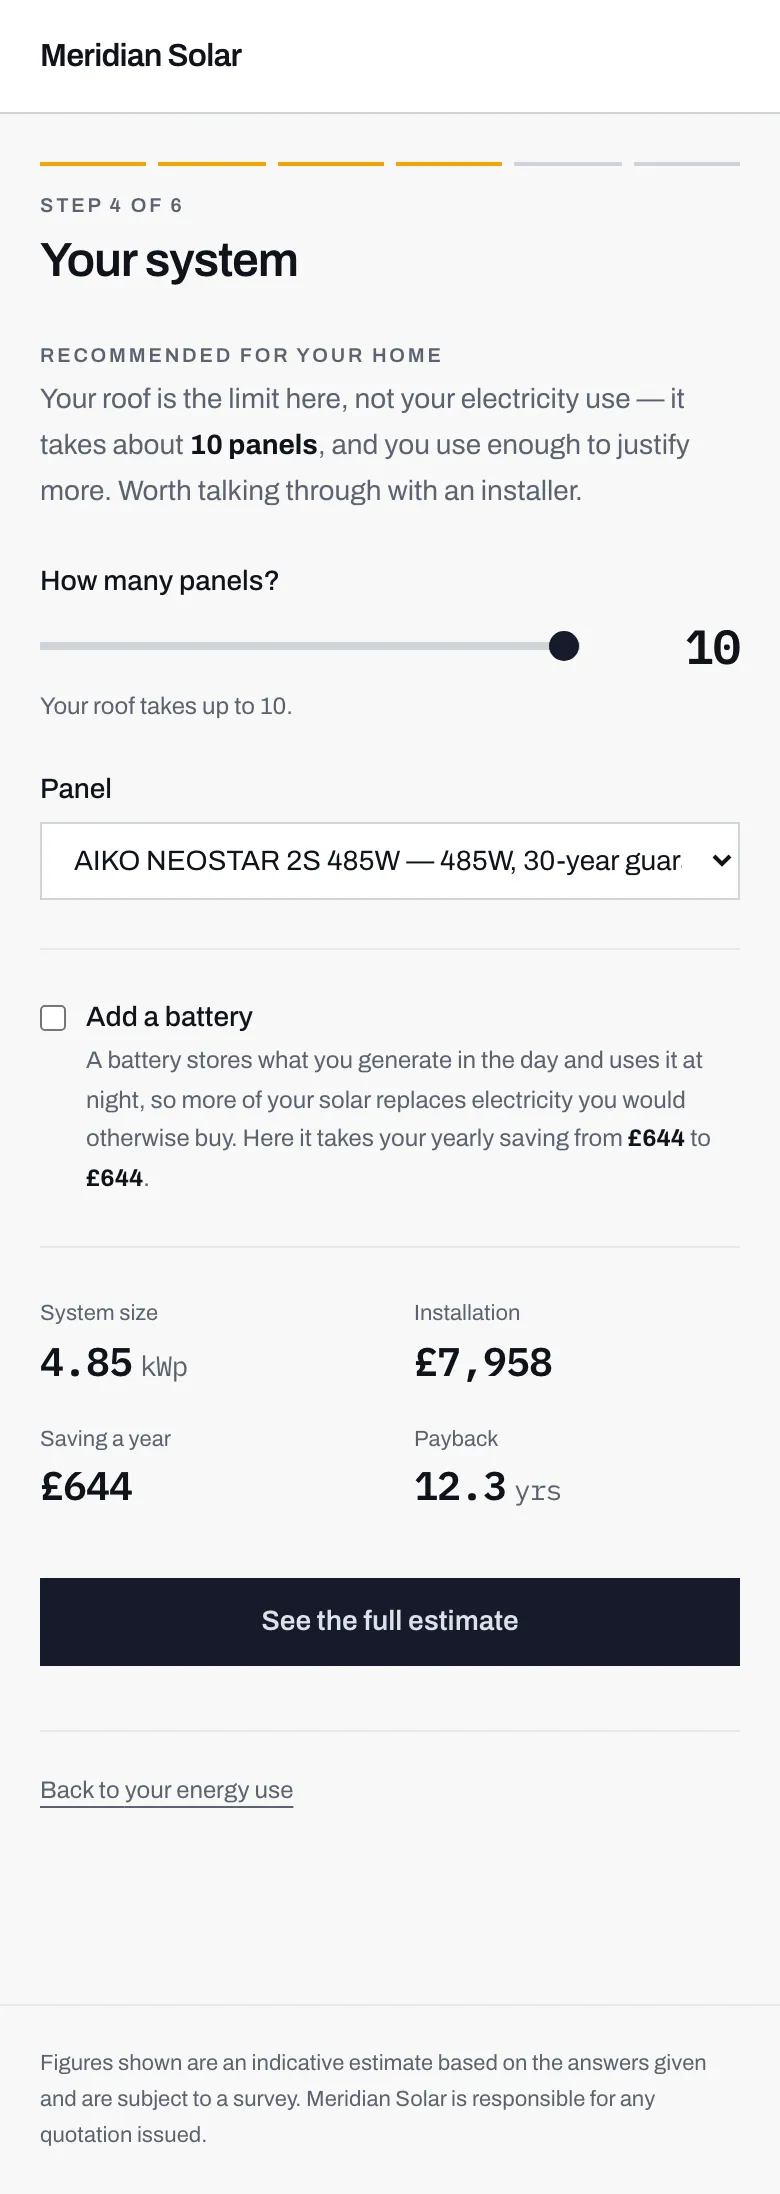
- The recommendation, written as a sentence rather than a number, because the reasoning is the useful part.
- Drag the slider to try more or fewer panels. Everything below updates as you move it.
- The ceiling, worked out from the roof you described in step 2.
- Adding a battery is a tick box, and the sentence next to it tells you what it does to your yearly saving before you commit.
- The four figures, live. These are the same four you get on the estimate at step 5.
The recommendation
Section titled “The recommendation”The calculator suggests a number of panels and tells you why in one sentence. There are two versions of that sentence, and which one you get is worth noticing.
The usual one says the system is sized to cover a good share of what you use, without generating a lot that you would have to export cheaply. Exporting means selling your spare electricity back to the grid, and it pays considerably less per unit than you pay to buy it, so a system far bigger than your own consumption stops paying for itself.
The other one says your roof is the limit rather than your electricity use: it takes about this many panels, and you use enough to justify more. That is a useful thing to know before you talk to anyone, and it is worth raising on the call. There are sometimes ways round it, like a second roof face.
How many panels?
Section titled “How many panels?”A slider, from one panel up to whatever your roof will take. The live figure beside it shows the count, and the caption underneath tells you the maximum.
Move it and the four figures at the bottom recalculate straight away. More panels means a bigger installation cost and a bigger yearly saving, and the relationship between the two is not a straight line, which is the whole reason the slider is there to play with.
If you move away from the suggested number, a line appears saying you have moved off the recommendation, which is fine, and that it will be flagged for the installer. That is not a telling-off. It means the installer opens your enquiry knowing you deliberately asked for something different, and starts the conversation there instead of assuming a mistake.
A dropdown of the panels that installer actually fits, showing the make and model, the wattage, and how long the guarantee runs.
It is their own catalogue, not a general list, so everything in it is something they can genuinely supply. Higher-wattage panels produce more from the same roof space and usually cost more. If the choice means nothing to you, leave it: the installer will talk it through, and the first option is one they are happy to fit.
Some installers have not filled in a catalogue yet, in which case there is no dropdown at all and the estimate uses their standard panel.
Add a battery
Section titled “Add a battery”A battery stores the electricity your panels make during the day so you can use it in the evening, instead of exporting it cheaply and buying it back at full price after dark.
Tick the box and the sentence next to it tells you what it does to your yearly saving, with the before and after figures written out. Untick it and the numbers go back. Nothing is committed either way.
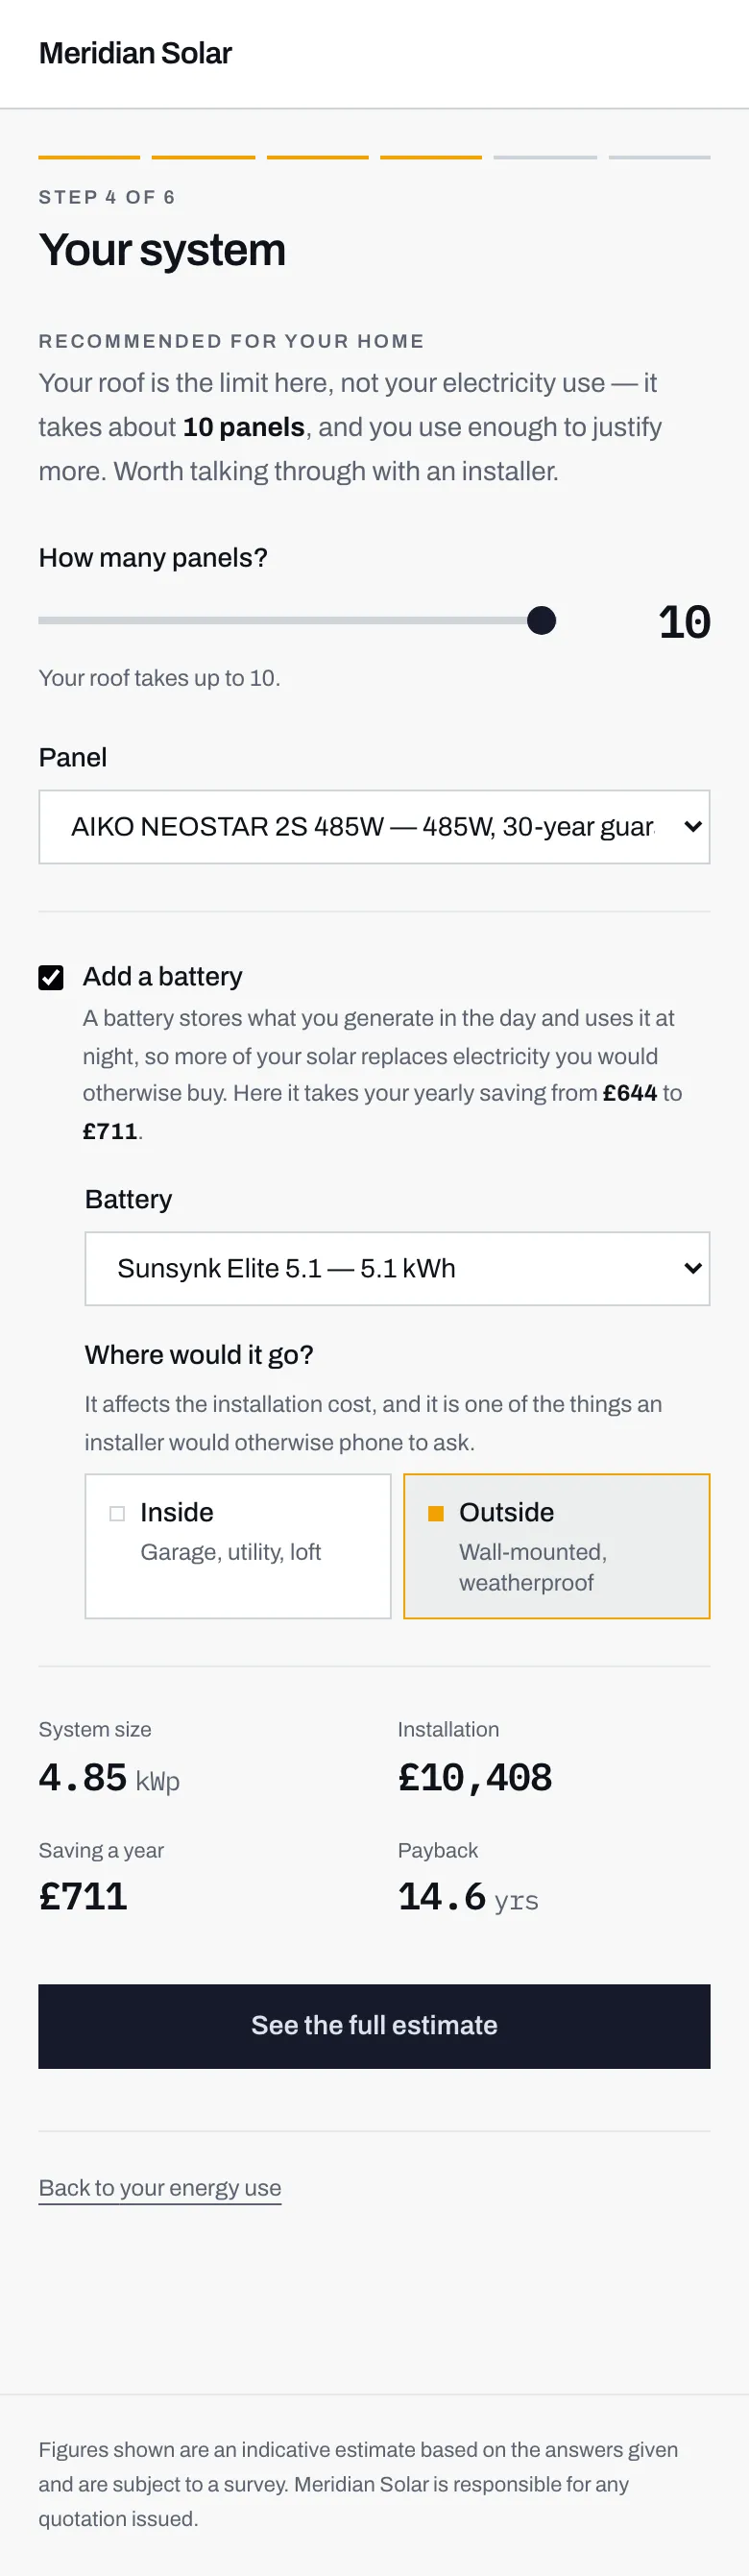
- Ticked. Two extra questions appear underneath.
- Which battery, from the installer's own range, with its capacity in kWh.
- Where it would go. Outside is the default, and it is one of the few answers that changes the installation cost.
- The figures update to include the battery.
Where would it go?
Section titled “Where would it go?”Two answers: Inside, meaning a garage, utility room or loft, or Outside, meaning wall-mounted and weatherproof. Outside is the default.
It is a small question with a real cost attached, because an outdoor battery needs a weatherproof unit and a different installation. Asking it here saves the installer a phone call, and saves you a surprise later.
The four figures
Section titled “The four figures”At the bottom of the step, four numbers update as you change anything:
- System size, in kWp
- Installation, the cost of putting it in
- Saving a year
- Payback, in years
kWp stands for kilowatt peak, and it is the standard way of describing how big a solar system is: what it would produce in bright, ideal conditions. All four are explained properly on the four numbers, and there is also a glossary.
Then press See the full estimate.
Next: step 5, your estimate.